• Inventory Split Incoming

    MassiveCraft will be implementing an inventory split across game modes to improve fairness, balance, and player experience. Each game mode (Roleplay and Survival) will have its own dedicated inventory going forward. To help players prepare, we’ve opened a special storage system to safeguard important items during the transition. For full details, read the announcement here: Game Mode Inventory Split blog post.

    Your current inventories, backpacks, and ender chest are in the shared Medieval inventory. When the new Roleplay inventory is created and assigned to the roleplay world(s) you will lose access to your currently stored items.

    Important Dates

    • April 1: Trunk storage opens.
    • May 25: Final day to submit items for storage.
    • June 1: Inventories are officially split.

    Please make sure to submit any items you wish to preserve in the trunk storage or one of the roleplay worlds before the deadline. After the split, inventories will no longer carry over between game modes.

How 2 Shade With Papa Molag.

Joined
Apr 25, 2014
Messages
58
Reaction score
230
Points
0
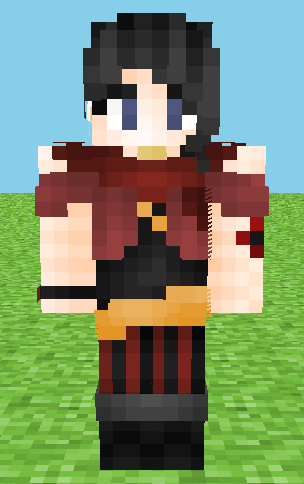
There's many ways to shade. This is how I shade and I find it easy, you can find your own way too. I just came across this one day and found it was simple! If you have questions feel free to ask and I can try to answer them. Questions on the topic though.

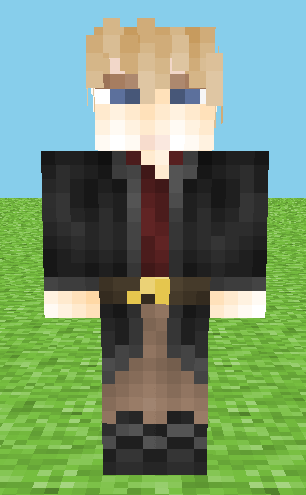
STEP 1: Unshaded base. Make an unshaded base, it's kinda simple.


STEP 2: Make a range of colours from your darkest to lightest. (You only need to do four minimum, I personally do six. Also notice how I clicked on that colour it brought up a selection, if you're using novaskin that's what I do. I then place the darkest down and go up till I get six light to darks I am happy with)

Step 3: Proceed from these shades going in a direction from darkest to light, lightest to dark. Rinse and repeat.

Step 4: Reward???: (Though I only recommend this for method for shading skin tones and clothing, not hair.)
 
Last edited:
Oh snap. This just reminded me how to make capes, because I totally forgot. My thanks.
 
I'll show some stuff I've done using this technique. If anyone else wants to show their shading technique on this thread I'd be cool with that.

Vi-bZBf217RNm4Tuh0k_WxK4iWpcYkj_oV0yPvvbgNtKcR5o7hAn8LthlmstdTf2w_ncmE-cueYBw-QQdwemWGBQSyku2PbFbGSfXbgBQQzj01wSgbKjKCd4y_VkobpomUvO05pq
R2_PUkrjPpbYhnNXF24NLyKEnfuN1Cb0qMApucJhfxHLBOSv-W_ccfL2OfqZUtC0OqEDNwfjidOnKiQuouAiSCct7RNuogqVwG3IL0IuXBAGb5uvM92gApWvkNtKDNG7eX7OPCEk
m-4IYxS_xD_mRlLF-_OszFlax_m8Tc5sOcByEHXLftKJcY6hJc99G2rzNcZertv4gbUauD_SCkrOSrwjoF5oYsGhgkOZov-jv22QhGgPRy09sJvtzFhJWkPBNZDC8Q3zv0YzegkF
 
I really like this, so I couldn't help but make a quick explanation on my own method. I believe an artist by the alias of kawacy has a better diagram/example, but here's my take on what he and many artists do:
yep.png

The first one is a base, the second is used for some color (like blush or w/e), the darkest/peach one is for shading.

The ones on the side are what I wouldn't use for shading, they're kind of fine to use for someone who looks a bit sick. But, eh. Doesn't look as lively.
another.png
i hope this was somewhat helpful
 
since it's only skinning, i don't bother with swatches, and instead make use of the darken/lighten tool. i dont do this when drawing, instead i change the hues. and i wouldn't say my skins look too bad. also the dodge/burn tools are there, but they can produce some odd colours sometimes.
78065f41f70cc5ad1f15a5623b615edf.png
df26ad2e3afe2f2e4ada39d21000c41d.png
d9400abc624f0d385bf74741c9642c8b.png


Write your reply...